Unity export tips
The following tips may help you to reduce the final build size and increase the performance of your game, thus increasing your revenue. Don't forget to also have a look at the WebGL Optimizer utility that the CrazySDK provides by default.
Build size
This section contains various tips for decreasing the build size of your game. A smaller build will increase the load rate of your game, subsequently increasing your revenue.
Compression
Unity supports Brotli and Gzip compressed builds for WebGL.
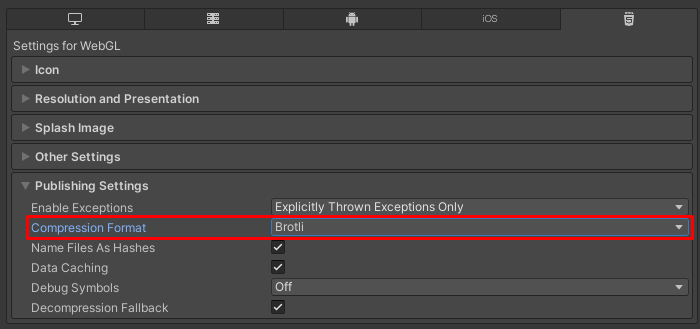
We recommend that you use Brotli compression, which is supported in all the major browsers (caniuse.com) . Although it takes longer to build a Brotli compressed game, the final build is smaller compared to gzip. This improves the loading rate for your game significantly, and thus your revenue.
You can read more about Unity compression on their official documentation.
Code stripping
The code stripping functionality allows Unity to remove unused code from your project, thus reducing the final build size.
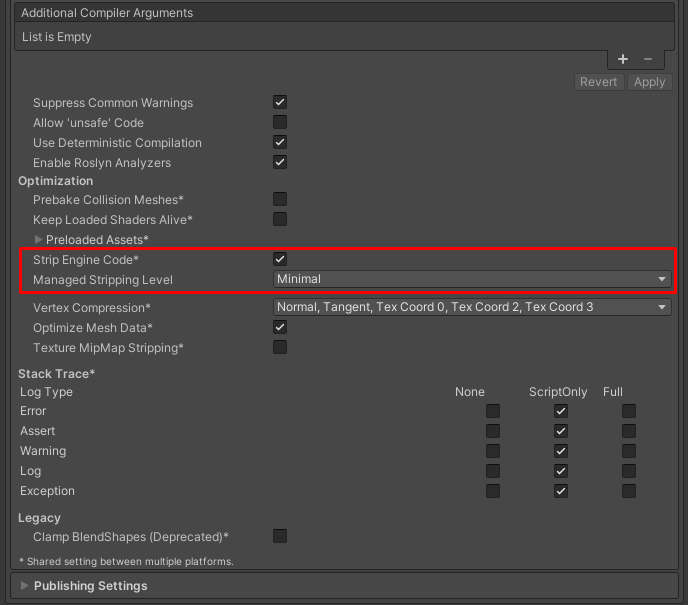
By default, it is enabled, and set on the minimal level. If you are looking to further optimize your build size, you can increase the level to low, medium, or high. Be sure to test the final build, since, with a higher level of stripping, chances are that some useful code will also be removed. To read more about code stripping and how to protect your code from being removed at higher stripping levels, please check the official Unity documentation.
API Compatibility Level
We recommend that you use the ".Net Standard" API compatibility level, as this provides smaller build sizes. ".Net Framework" should be used only if the game depends on APIs not compatible with ".Net Standard".
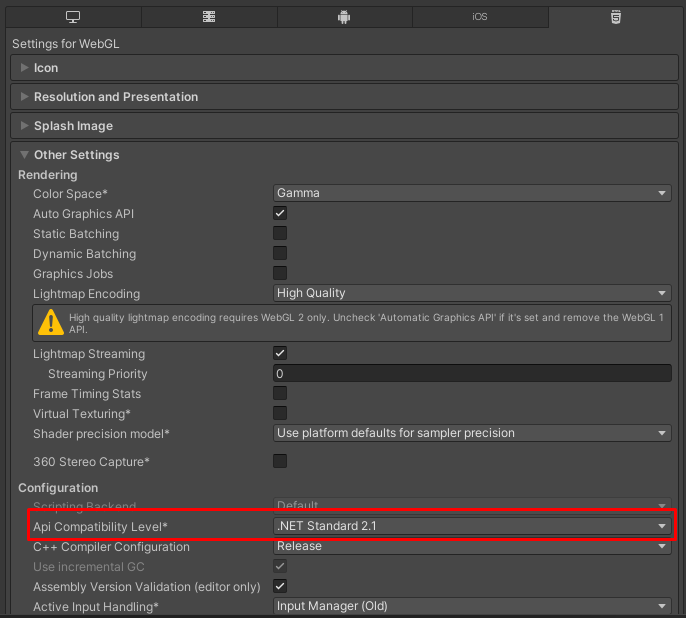
You can read more about the API compatibility, and other WebGL export settings on the official Unity documentation.
Texture compression
Another way to decrease the final build size is to correctly set the texture max size.
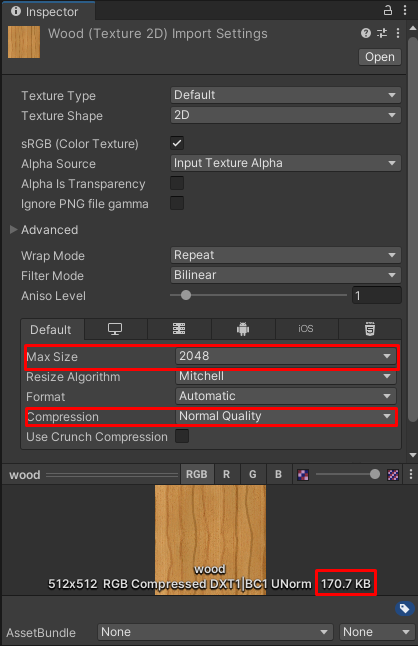
Some purchased assets, imported models, or even your textures, may have a large size, for example, 2048x2048. It is a good practice to set an appropriate size for the texture since this will reduce the size of the texture in the final build. For example, for small objects, or far away objects barely visible, you can pick a smaller texture size since the quality loss will not be as noticeable. Furthermore, you can also select low quality in the compression drop-down, to reduce texture size even more. Don't forget to check if the game still looks good after tweaking texture size and compression quality. The changes will also be visible in the editor.
Streaming assets and addressables
Streaming assets can be also used to decrease your final build size. Textures and sounds occupy significant space in the final build, so they can be kept separate from it, and loaded at runtime. Not only does this allow faster game loading, but the external resources can be customized later without updating the game. In short, by creating a folder named StreamingAssets in your project and adding various assets to it, they will be included as a separate folder in the final build. After that, you can fetch assets from that folder via HTTP requests, and convert them into textures/sounds, etc. The Unity documentation doesn't tell much about this, but there is this excellent tutorial that contains more information.
There is also a new package from Unity, Addressables, that allows you to easier create asset bundles and load them at runtime when needed, thus keeping your initial build load size small.
URP and post-processing effects
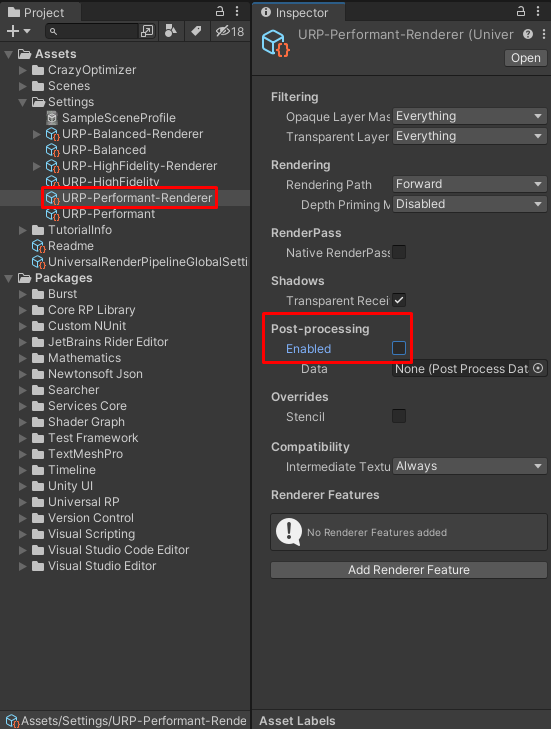
If your game is using URP but you aren't using any post-processing effects (tonemapping, bloom, vignette, etc) we recommend that you disable the post-processing feature in the pipeline data. This will reduce the size of a Brotli compressed build by approximately 1mb. You can disable the post-processing effects by selecting the URP asset data, and unticking post-processing.
Mesh compression
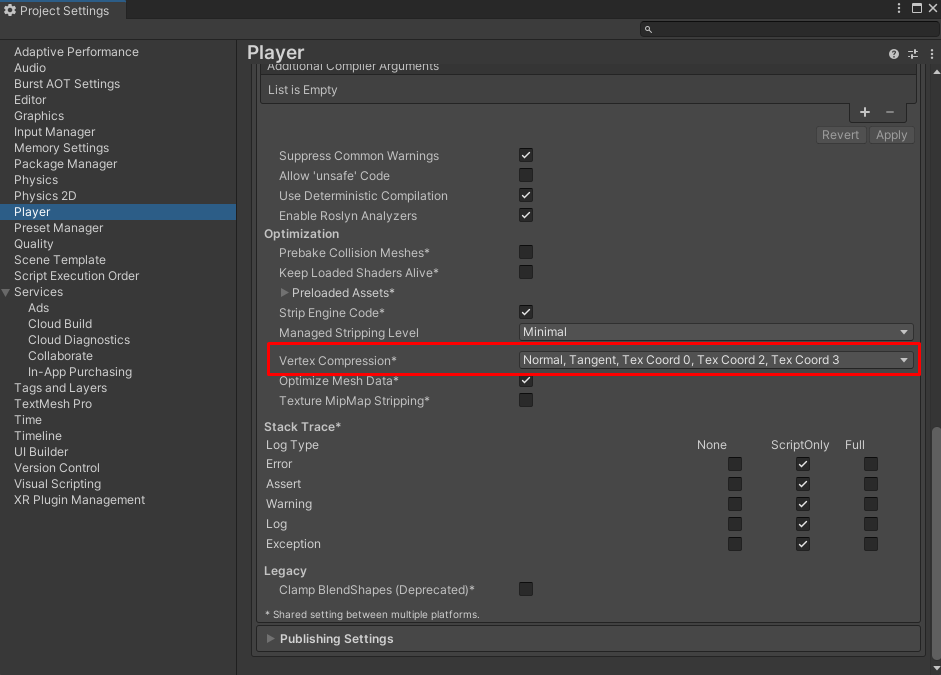
By default, Unity applies vertex compression to all the meshes in your project.
It is possible though to also enable mesh compression individually for each mesh. You can do this by selecting the mesh, selecting a compression level, and clicking the "Apply" button afterward.
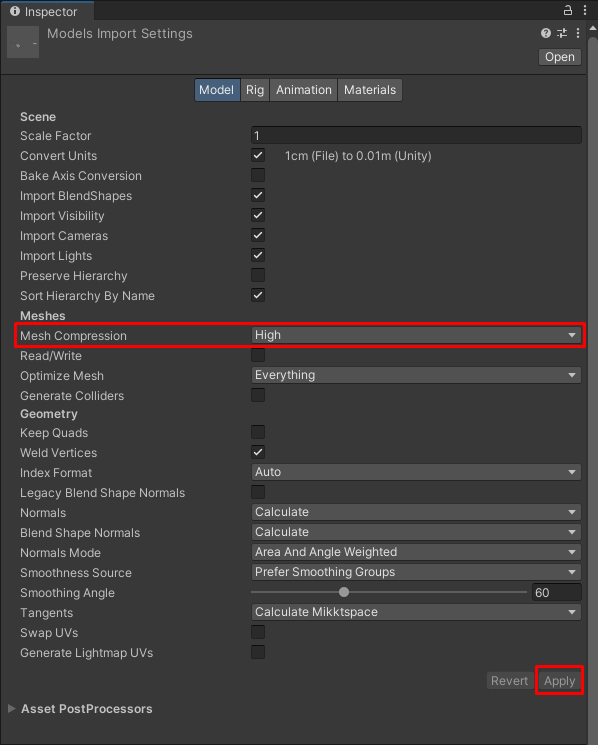
This will reduce even more the build size compared to vertex compression. In our tests, a mesh file that was vertex compressed occupied ~300kb in the final build but individually compressed with the High option its size was lowered to 100kb.
Individual mesh compression doesn't come without any drawbacks. It may cause the following 2 things:
- slower loading times, since the meshes have to be decompressed on game start
- artifacts, since some data may get altered during compression
In our tests we didn't notice any of these, however, we recommend that you give a quick test to your game if you decide to compress the meshes individually, to be sure it still looks and loads fine.
You can read more about mesh compression on the official Unity documentation
Performance
This section contains various tips for improving the performance of your game. There are a lot of users that may play your game from weaker devices, for example, Chromebooks. So ensuring everyone can play it as smoothly as possible will result in increased revenue.
Sprite atlases
For each individual sprite that you have in your 2D game, Unity will issue a draw call. The more draw calls your game has, the slower it will run. The sprite atlas combines multiple sprites in a single texture, thus issuing only a single draw call for the combined sprites.
You will need to install first of all the 2D SpriteShape package.
![]()
Afterward, you can click anywhere in your Project view, and select Create > 2D > Sprite Atlas option to create a new Sprite atlas.
![]()
For more detailed information please refer to the official Unity documentation.
Static batching
Batching is a powerful technique to reduce the draw calls and thus increase the performance of the game. Static batching combines meshes from the objects that don't move, and sends them in a single draw call to the CPU. If you want to use static batching, you need to enable it in the build settings:
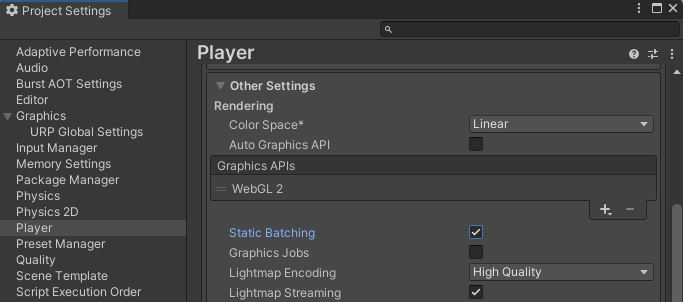
Furthermore, you'll need to also mark your objects as static objects, by either enabling the Static toggle or selecting only the specific Batching Static flag. Static objects must be objects that don't move, for example rocks, clouds, and buildings.
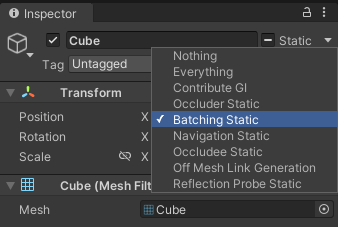
Static batching works by creating a combined mesh from all the static objects. This means that the more static objects you have, the more memory will be used. For example, if you have a forest with a lot of trees and mark them all as static, memory usage may increase substantially. So sometimes, compromises have to be made between memory usage and rendering performance.
Check the official Unity documentation to find out more about static batching.
Exceptions
You can choose various levels for exception support when building for WebGL.
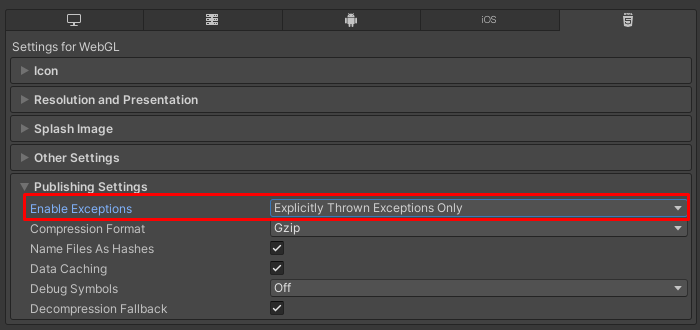
Selecting "None" provides better performance and smaller builds. However, if there is an exception thrown during the game, for example in a try/catch block, the game will crash. We recommend using this option only when you are sure the game runs as smoothly as possible, without any bugs, and you don't have any try/catch blocks in your code. Otherwise, the default "Explicitly thrown exceptions only" is also a good starting point. We recommend that you never submit a game with the "Full With Stacktrace" option selected. This option is only good for debugging, and it decreases the performance and increases the browser memory usage. You can find more information about exception support on the official Unity documentation.
Runtime memory
Background audio compression
The official Unity documentation recommends using the CompressedInMemory load type for background audio. This decreases the runtime memory usage because the audio clip doesn't have to be decompressed when the game runs. The drawback is the loss of precision and the latency, which usually don't matter so much for background audio.
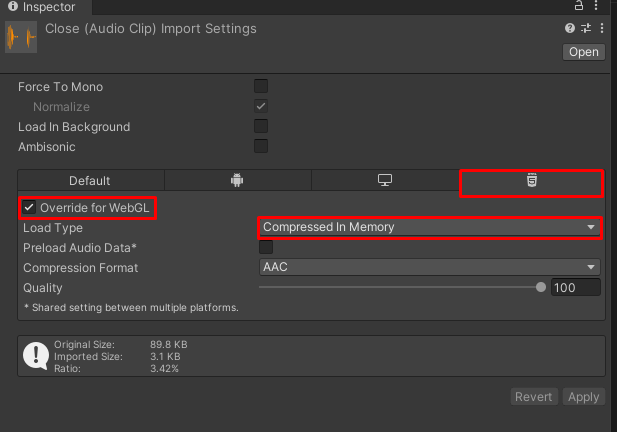
The following is a screenshot from the Unity Memory Profiler, which shows the total RAM memory used by a background audio clip. When the load type is set to CompressedInMemory (column A), the audio clip uses only 5mb of RAM.

Other
Name file as hashes
We recommend that you select this option when building your game.
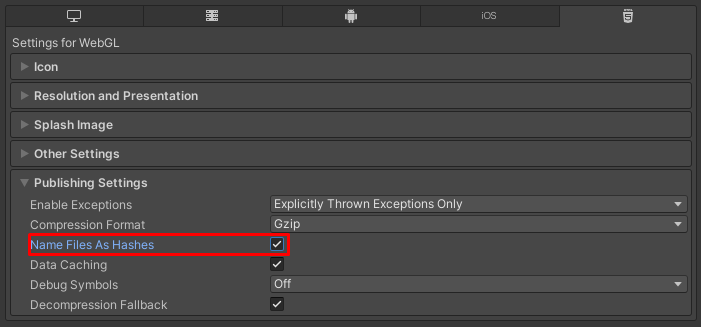
The files will have unique names on every build, composed of the MD5 hash of their content. Although we clean the cache on our side after each game update, the browsers may still hold onto the old files, and unique file names fix this problem.
Index.html and your custom JavaScript
For Unity games on CrazyGames, we ignore the index.html file and store only the build files. So any changes that you do to the index.html file or any additional JavaScript files that you include, won't be available. If your game relies on external JavaScript files, you can upload it as an HTML5 game. However, you will be missing the Unity improvements that we do, for example fixing broken loading indicators for specific Unity versions, the loading indicator itself, etc.