GameMaker
Requirements
When integrating the CrazyGames SDK, make sure to follow our requirements. They will help you use the SDK in the best way possible and guide you in terms of technical, gameplay, ads and account integration requirements.
Sample project
To get started, download the sample project. To avoid weird browser behaviour, right click the link, select Save link as.
Customizing index.html
Installing the SDK
To begin, let's install the SDK by inserting a <script> tag into your game's index.html file. The easiest way to do this is to copy the HTML file that Game Maker outputs, modify it, and then include that copy as a custom HTML file.
- In Game Maker Studio 2, Compile your HTML build.
- Unzip the zip file that Game Maker creates for you.
- In the unzipped files, find
index.html. It should be in the root. - Make a copy of the
index.htmland move the copy toPROJECT_FOLDER/datafiles/(wherePROJECT_FOLDERis the root directory of your project). If your project does not have a/datafiles/folder create it first. - Open your newly copied
/datafiles/index.htmlin a text editor. - Insert the following somewhere in the
<head>...</head>container: - Save the changes you've made to
PROJECT_FOLDER/datafiles/index.html. - In Game Maker Studio 2, from the Asset Browser panel, open
Quick Access > Game Options > HTML5.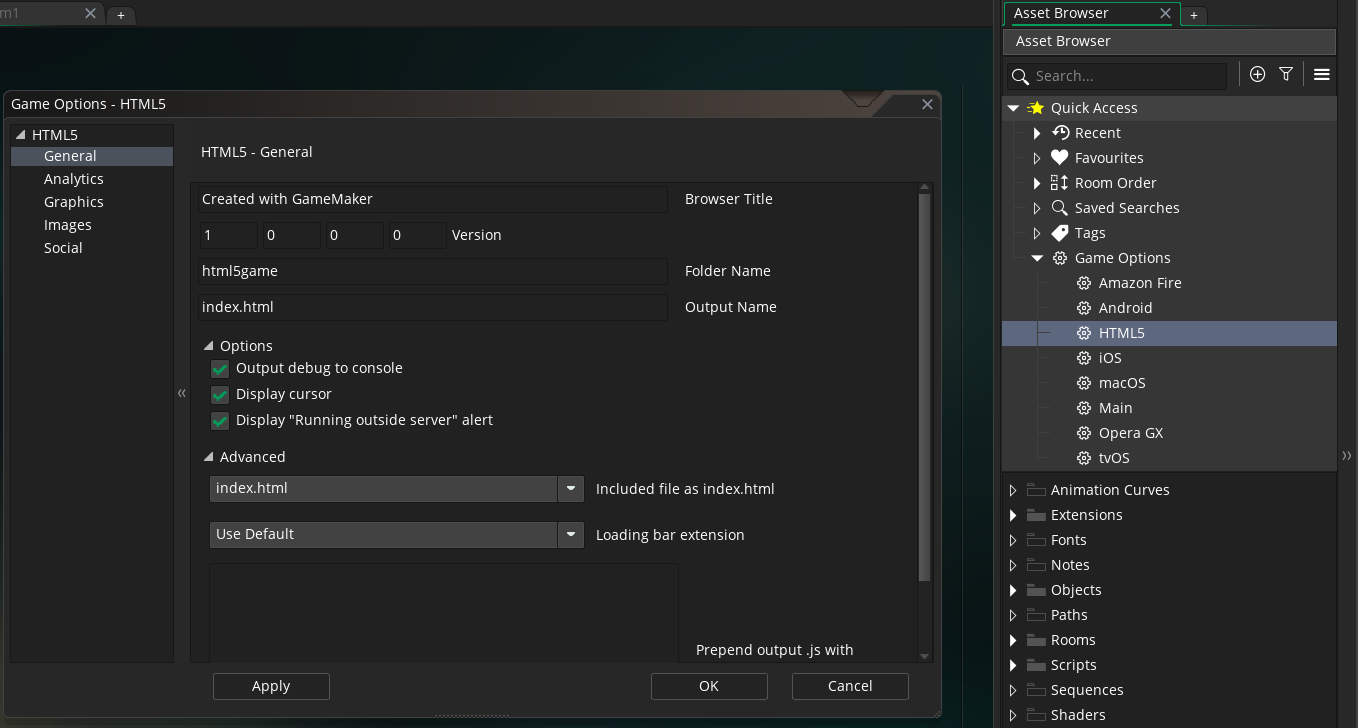
- Under
General > Advancedwhere it says "Included file as index.html", change the dropdown selection from "Use Default" to "index.html". If "index.html" does not appear in the list, close and reopen theGame Options > HTML5dialog. - Now your game will be using your custom
index.htmlthat contains the modifications.
Setting up banner containers
You can further customize index.html if you wish to display banner ads. You would create a <div> container for each banner ad, describe its size and placement using CSS, then show and hide them through GML code. Here is a basic example of having two banners in your game:
- Insert the following just before the closing
</body>tag: - The
crazy_bannerclass is required. (Later on, we will import a JS extension that depends on this class name for querying all banner containers.) - Insert the following, just before the closing
</style>tag:.crazy_banner { display: block; position: absolute; background: #00f; /* remove this line when you are done testing size and placement */ } #crazy_banner_1 { top: 0; left: 0; width: 300px; height: 250px; } #crazy_banner_2 { top: 0; right: 0; width: 300px; height: 250px; } .crazy_banner.hidden { display: none; } - To preview their size and placement, remove the
hiddenclass from the<div class="crazy_banner hidden">containers (remember to add them back after). You can customize their size and placement by modifying the CSS as you wish. - The IDs and their corresponding selectors can be renamed as you wish, but this guide will refer to them as
crazy_banner_1andcrazy_banner_2. - When you are done previewing size and placement, remove the
background: #00F;declaration from the.crazy_bannerselector, and add thehiddenclass back to your<div class="crazy_banner">containers. - Now that you've set up your containers, you can fill them with ads during gameplay using GML (covered later on).
Import the JS extension
Next, you'll need to import a JS extension so that you can call JS functions directly in your GML code.
- Download this sample project (right click the link, select
Save link as) and double-click to open it. It should open automatically in Game Maker Studio 2. - A save dialog will open. Select a temporary location, such as the root folder where you keep your game projects.
- In Game Maker Studio, in the Asset Browser panel:
- Right-click on any folder or asset.
- Click
Add Existing.
- Navigate to where you unzipped the sample project and find the
/extensions/crazygames/folder. - Select (open) the
yyfile. - The extension should now be installed in your game.
GML implementation
Testing
You can test your progress at any time in Game Maker's debug mode.
Implementing a sitelock
A sitelock is a mechanism that deters third parties from stealing and reuploading your game to other websites and monetizing it without your permission. We currently do not have a sitelock for GML games, but what you can do is write some code that prevents your game from loading if it detects that it is hosted on a domain that is not approved.
Include the following code as early as possible in your game.
domain = url_get_domain();
if (
    !debug_mode &&
    string_pos( ".crazygames.", domain ) == 0 &&
    string_pos( ".1001juegos.com", domain ) == 0
){
    game_end();
}
When testing your game, remember to use debug mode to bypass your sitelock.
Note: string_pos() returns the position where a substring is found. It treats the first position as 1 and returns 0 if the string is not found.
Alternatively, instead of simply calling game_end(), if you like, you can display some instructions to the player to help them find your game. But that is up to you.
Initializing the SDK
Initialize the SDK by calling crazy_init() as early as possible in your game code. This also installs what is called event listeners, which allows your game to detect live events like when an ad break has started playing, or if an adblocker was detected upon initialization.
Receiving and handling events
To respond to browser events directly in your game, you can use a callback function. Create a script resource, named, for example functions, to contain the following function template:
function gmcallback_crazy_callback( _event ){
    if ( _event == "crazy.break.started" ) {
    } else if ( _event == "crazy.break.error" ) {
    } else if ( _event == "crazy.break.finished" ) {
    } else if ( _event == "crazy.banner.rendered" ) {
    } else if ( _event == "crazy.banner.error" ) {
    } else if ( _event == "crazy.adblock.detected" ) {
    } else if ( _event == "crazy.sdk.initialized" ) {
    }
}
You would write your code to execute in the case of each event. An example with the template filled in can be found at the end of this guide.
Note: The function name must be exactly gmcallback_crazy_callback for it to work.